Turbidity Sensor III – One more time

The next iteration of the turbidity sensor requires more thorough waterproofing from the beginning. Prototype I started as a simple proof-of-concept of the component combination ( LED, LDR in a garden hose enclosure) and had no consideration of waterproofing. After that, the focus of Prototype II lay on improving the initial design’s lack of water-proofing and adding long cables so it can be eventually tested out in the field.

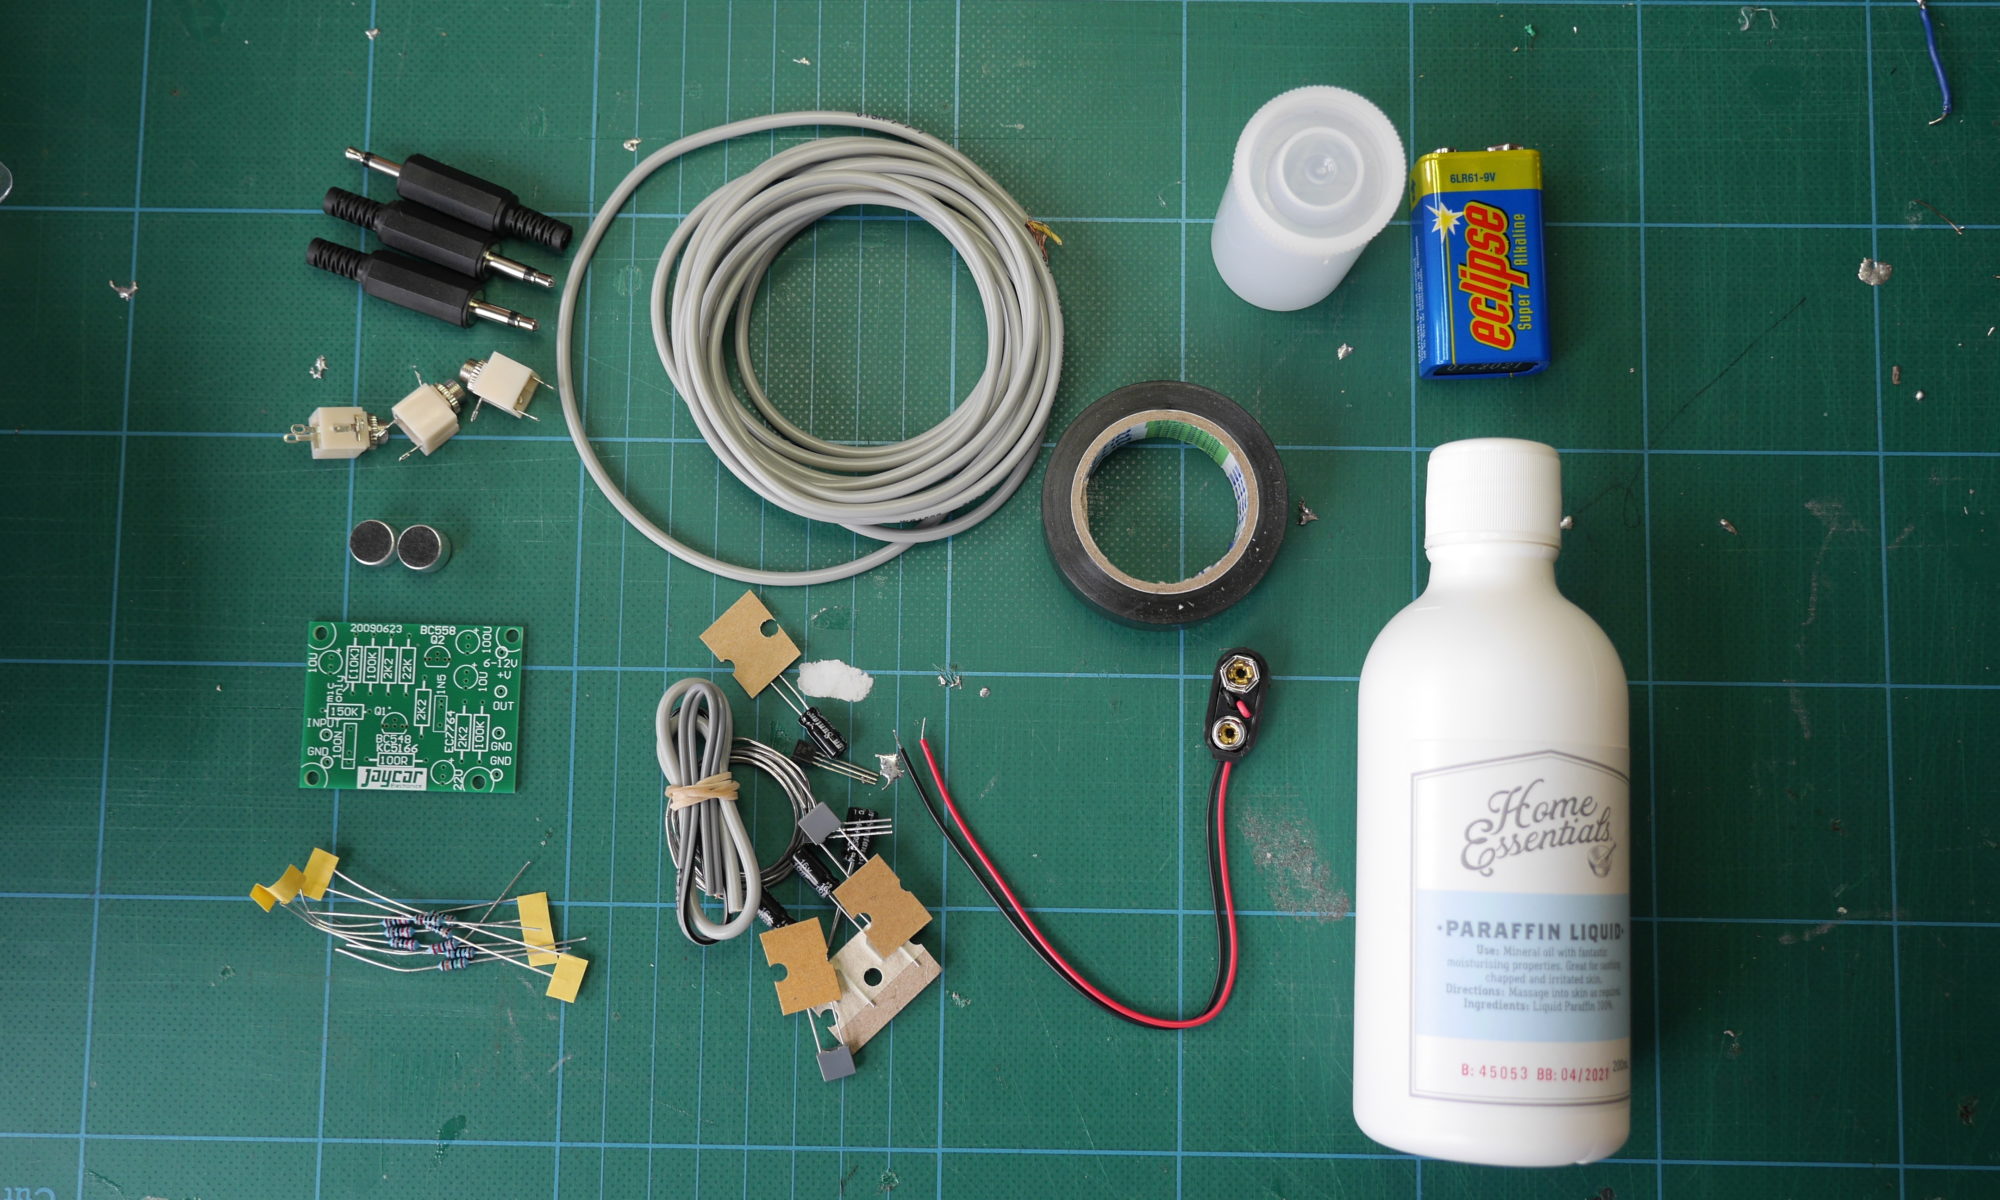
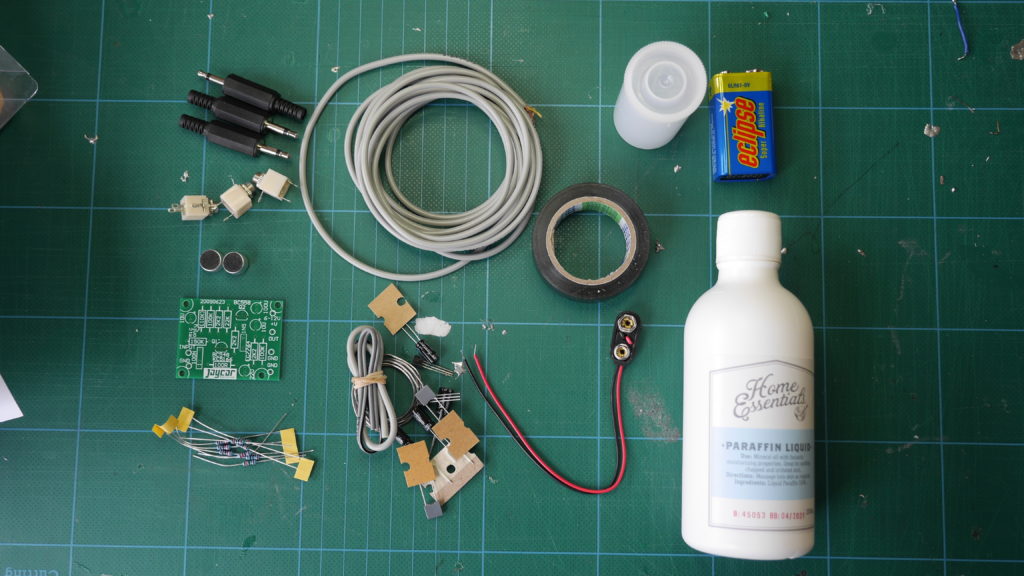
Part I: Components, cables and heat shrinking tube

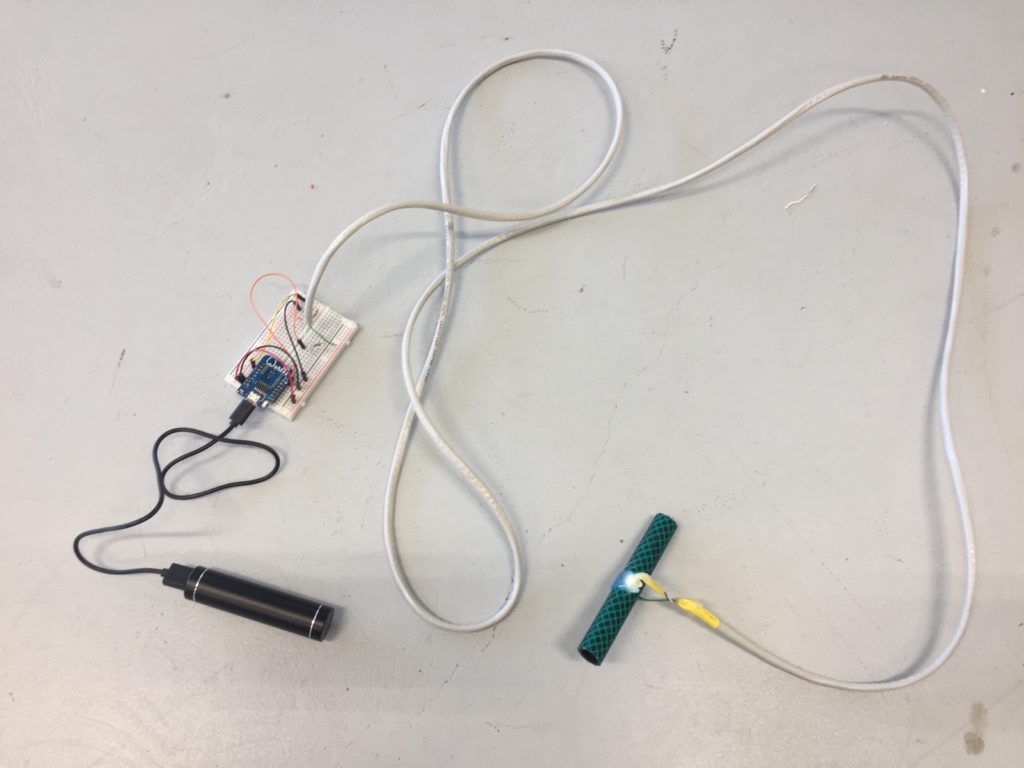
For this turbidity sensor design, I used an approximately two-meter-long stranded core CAT-5 cable to connect my white LED and my LDR to my Wemos D1 board.

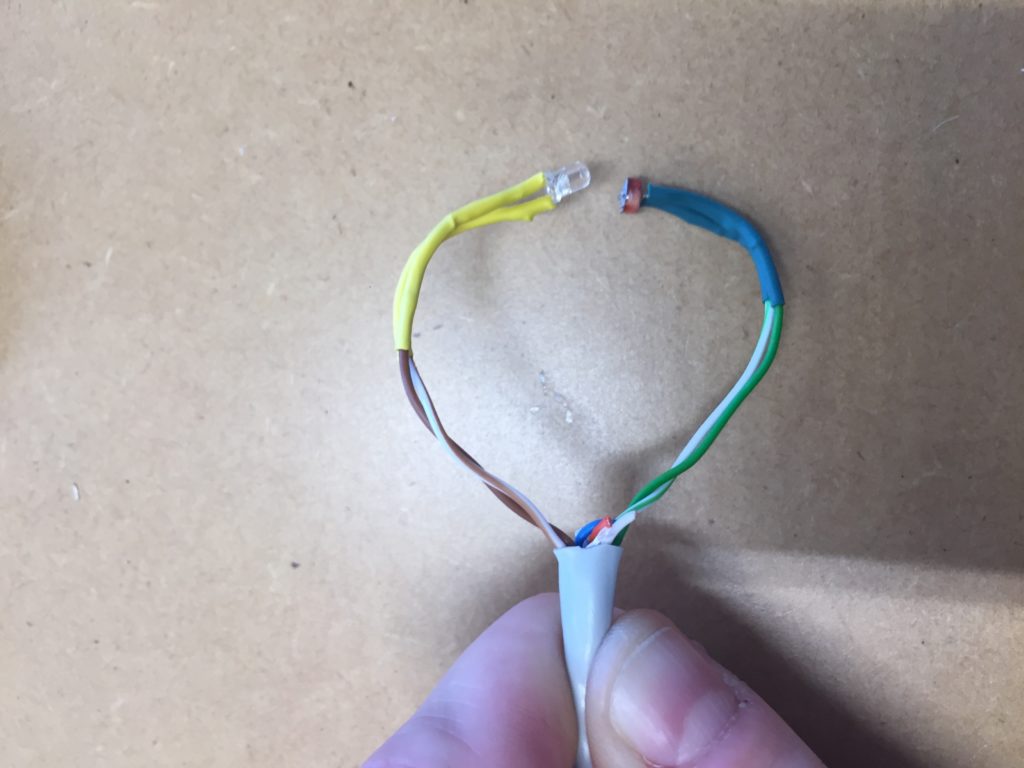
After assembly, I immediately sealed the components that eventually get submerged into the water with heat shrink tubing (yellow for the LED, green for the LDR).

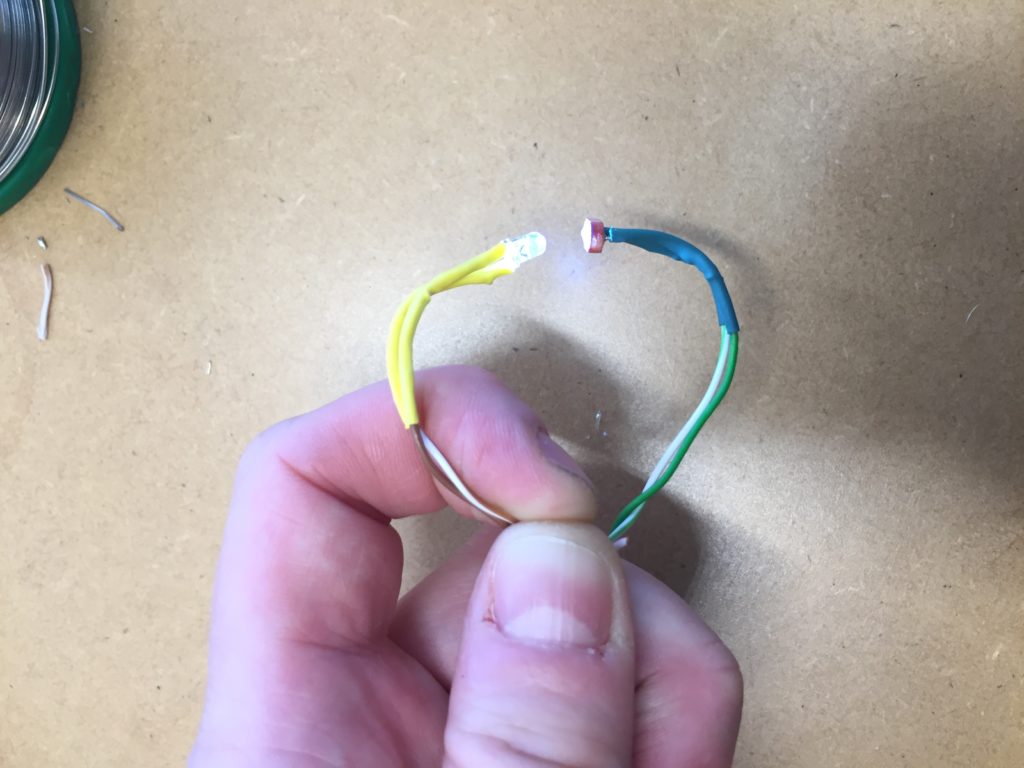
My first attempt at running the test code with the components through the two-meter-long wire went well. I tested the incoming values roughly by concealing the LDR with my finger.

Part II: Housing the components in the “test tube.”

Similar to the previous prototype, I cut a new 10cm piece off the garden hose and drilled two opposing holes of the size of the components in the centre. To attach the LDR and the LDR I used hot glue only this time. The reasoning behind this is that hot glue has a much shorter drying/hardening time than the All Clear sealant. This allows an efficient applying of layer after layer within a relatively short period. The sealant ideally requires overnight drying which means assembly would span several days instead of hours.

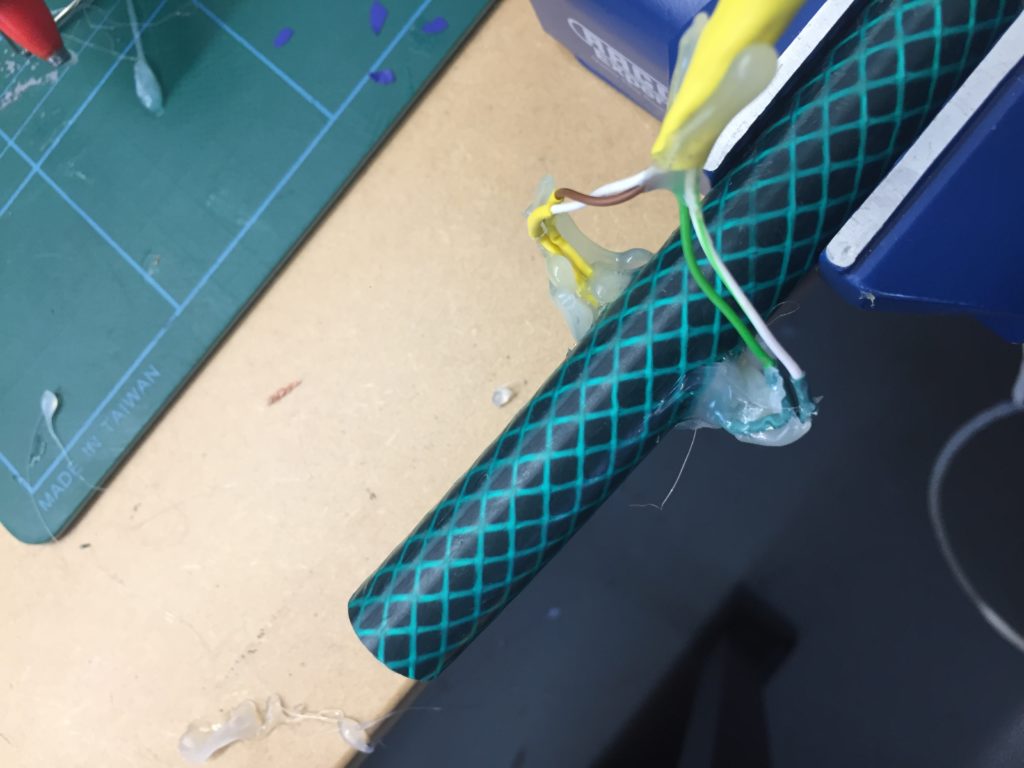
The work with hot glue is messy and requires diligence. Therefor, the purpose of the first layer is to attach the components to the hose and make sure they are facing each other correctly.

After the first layer has been applied I test that the components have not been damaged in the process of hot glueing. The incoming values look good so far, but I am not entirely happy with the design. It is quite hard to apply hot glue around the components evenly. I already spot some small grooves in the glue that could cause some leaks later on.

Part III: Dear hot glue, please protect my components

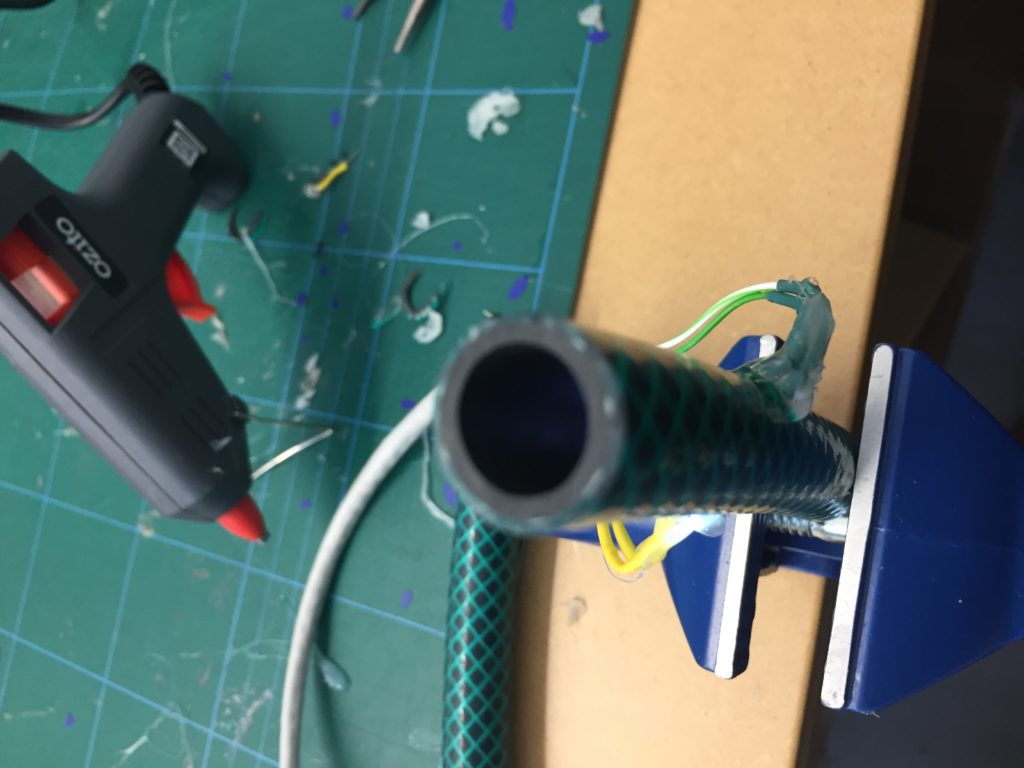
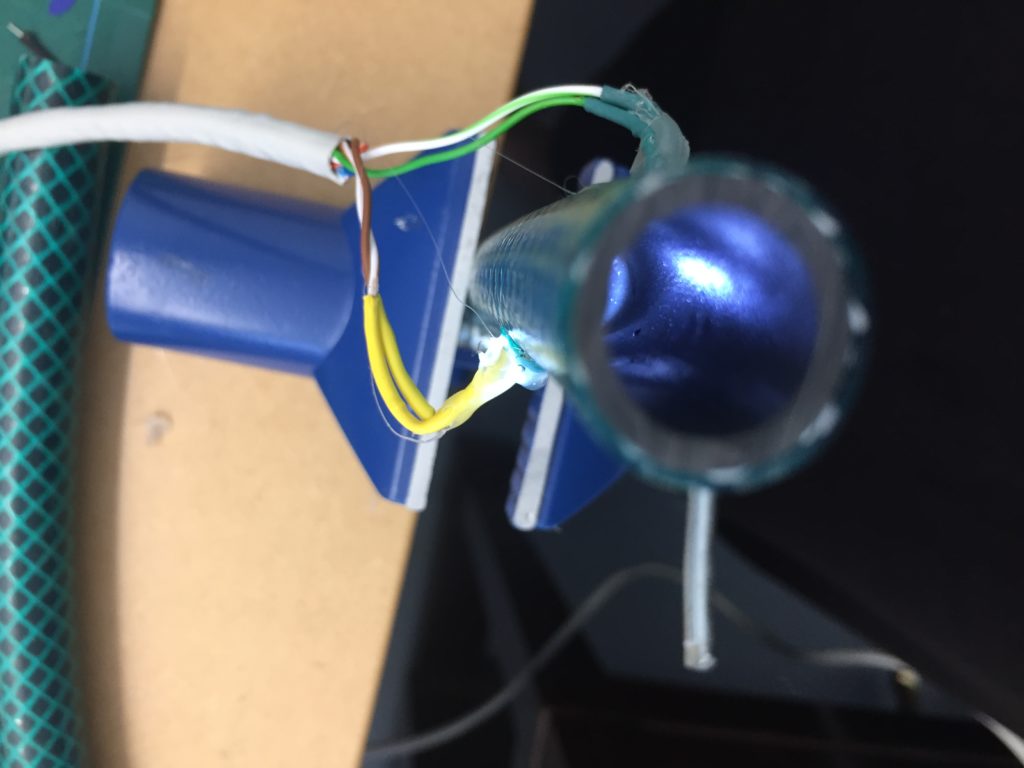
While applying the next layer of hot glue, I have already made peace with the fact that this probe is going to look very odd. Basically, I am looking at a small dark-green piece of garden hose attached to a long cable with semi-transparent blobs of glue. I also notice that the wire close to the components appears to be under strain caused by the angle the components are attached to the hose. I should have immediately bent the connectors at a right angle to avoid this oddly shaped glue blob altogether.

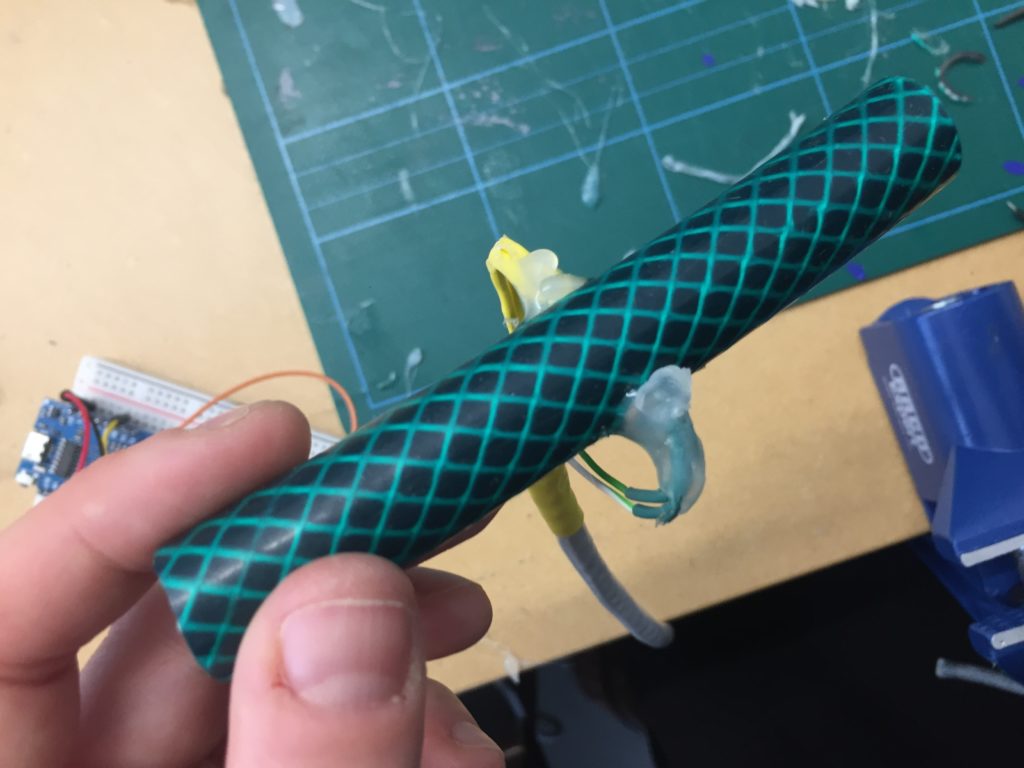
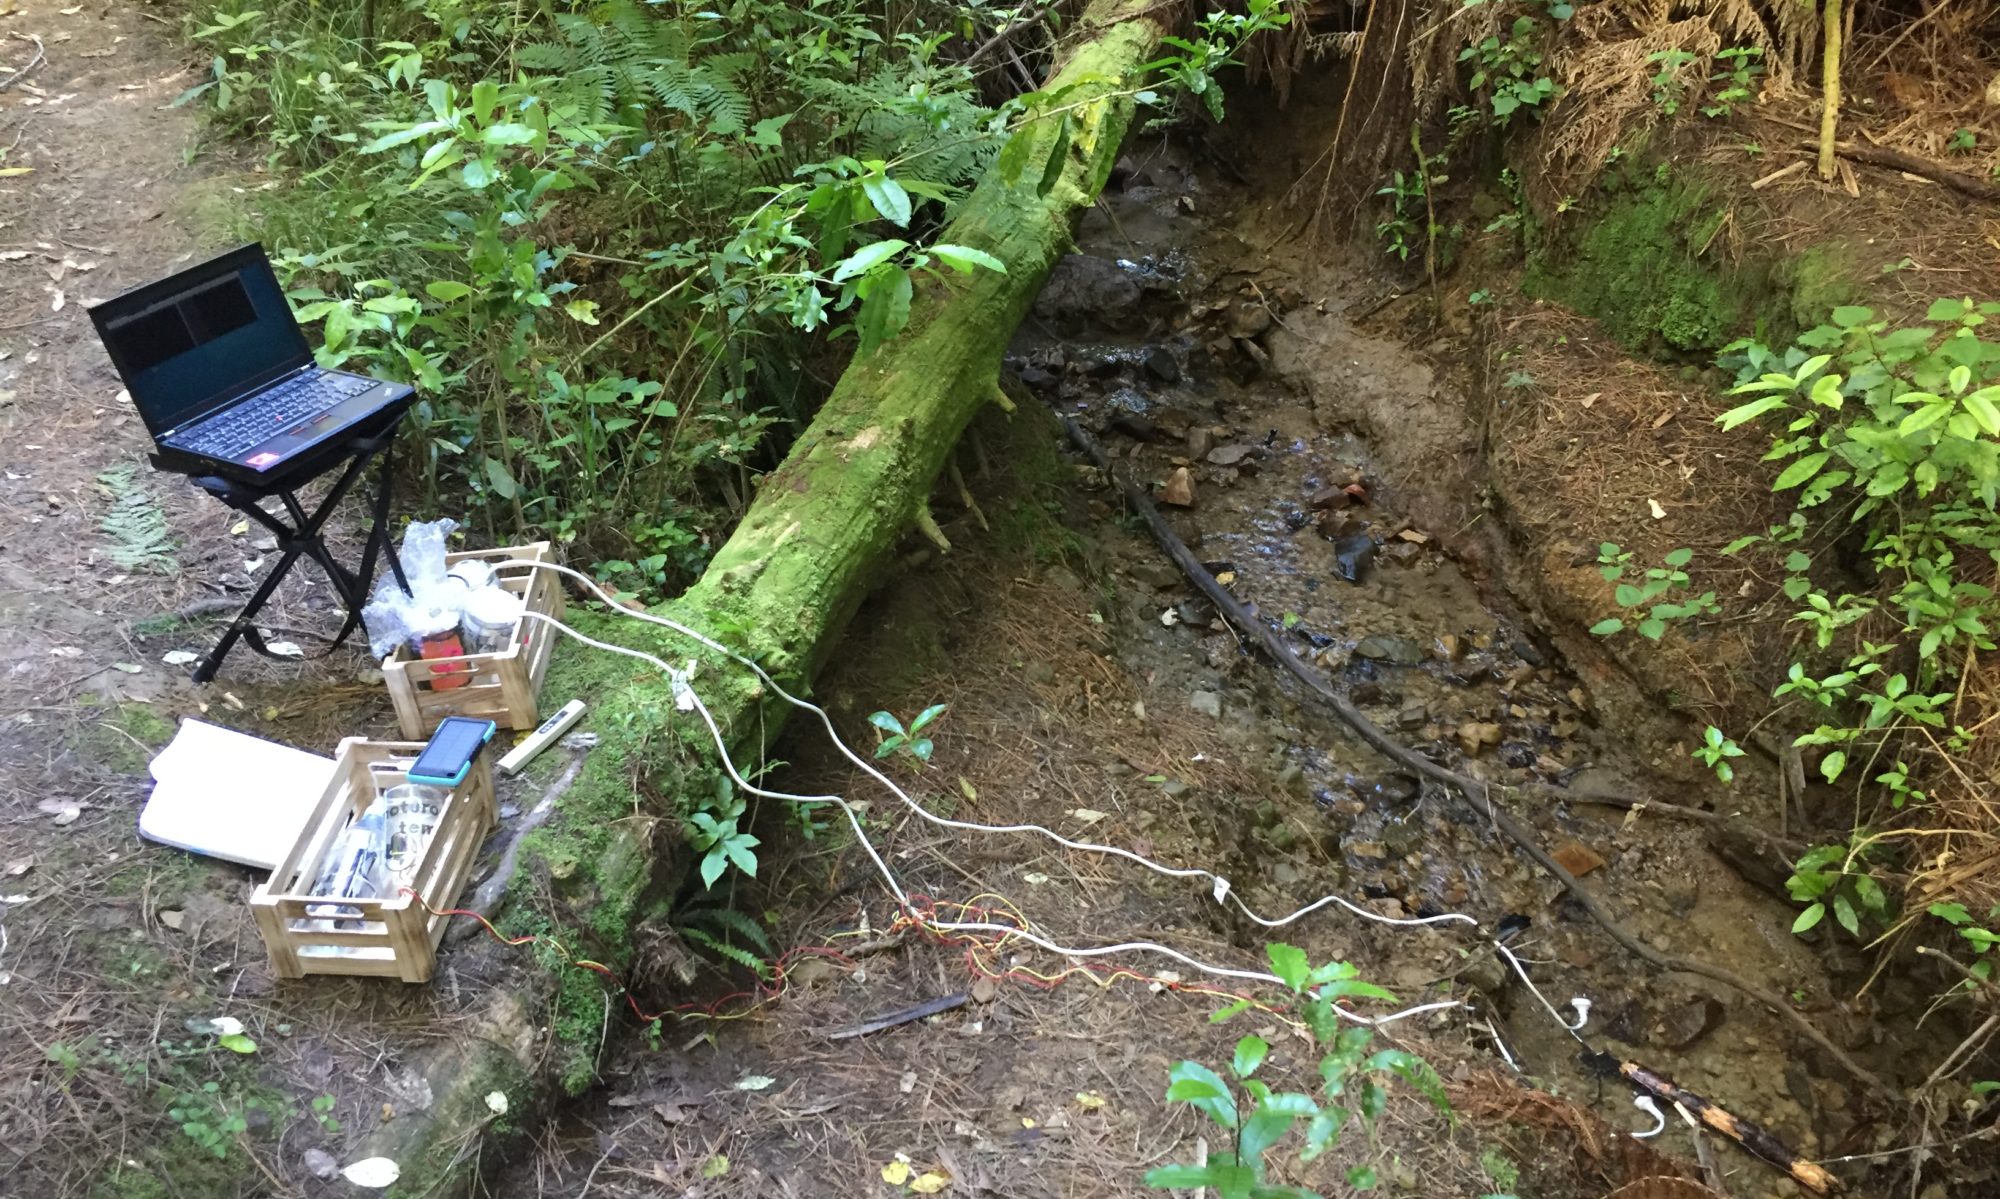
Despite the aesthetic shortcomings of this turbidity sensor design all components seem to be working, and I am ready to compile a version that sends data wirelessly via the MQTT network so I can safely test the design in an underwater setting, without the need of a laptop attached to any submerged components.

References
donblair. (2015, August 25). Turbidity 001. Retrieved January 18, 2019, from publiclab.org/n/12168
Kelley, C., Krolick, A., Brunner, L., Burklund, A., Kahn, D., Ball, W., & Weber-Shirk, M. (2014). An Affordable Open-Source Turbidimeter. Sensors, 14(4), 7142–7155. https://doi.org/10.3390/s140407142
NIWA. (2008, December 17). Training notes. Retrieved January 28, 2019, from https://www.niwa.co.nz/our-science/freshwater/tools/shmak/manual
/15trainingnotes
Open Water Project. (n.d.). Open Water Project. Retrieved January 28, 2019, from https://github.com/OpenWaterProject

Giving voice to the stream: An audio node part I

Several participants in my design evaluation interviews indicated the interest in having audio as a medium to access the stream sensor data. As a result of this, I looked at options to use the ESP8266 chip in combination with a simple audio interface. I found some research on using the Wemos D1 for sound applications, a previously purchased microcontroller, the Adafruit Feather Huzzah can be expanded with the Music Maker FeatherWing, which adds an audio interface with a headphone jack output which could be used as a standalone version in the field.

Setting up the Adafruit Feather Huzzah

The Feather requires you to install a USB-driver (USB to UART Bridge VCP drivers) to work with your operating system properly. Note: For this install you need to restart your computer.

The Huzzah is part of the ESP8266 board manager, which needs to be added to the Arduino IDE under via Arduino…Preferences…Additional Board Manager URLs…

If step one and two have been successful, the Feather should be ready to be programmed with the Arduino IDE.

Arduino…Tools menu showing correct Board and Port to work with the Feather

Success. The Blink sketch is running smoothly on my Feather.

    Feather Huzzah running the Blink script
Equipment Cost

I have ordered the Feather ordered at an earlier stage of the research project, but decided in the and not to chose it as the chosen as a central component of my project, mainly because of the price point (currently $33.00pp vs Wemos D1 $10.00pp on nicegear).

The Musicmaker shield adds another $36.00 to the sum.

For a complete audio player setup, an SD card (to store the mp3 files) and headphones are required. The MIDI setup does not require the SD card.

Adding the Audio Shield

Once the Musicmaker arrives I need to install some software as described in the guide by lady ada (2018):

  1. Install the library for the Adafruit VS1053 Codec Breakout (lady ada, p.13).
  2. Test the example code feather_player with two mp3 files on the SD card.
  3. Solder the MIDI jumper on the bottom of the board together and test the MIDI example.

So far so good.

Now I need to connect the Feather to my MQTT network and have audio play triggered by a callback.

After some fiddling with the code, I manage to play the test Ocarina scale from the example code when the EC sensor and the water temperature sensor transmit data across the network.

The audio jar stands now among two visual outputs. While it offers a different mode of access to the stream data, it also breaks with the convention of having one-on-one relationships between input and output nodes.

I also need to consider if the jar casing is the best choice for this node, and how an audience would access the data in the field. The node could be a hidden audio jack that participants can plug their headphones into, or headphones can be provided. Alternatively, I could use a small speaker to play the sound output and make the experience accessible to multiple users at the same time.

The opportunities for this extra node need to be tested and evaluated in the field.

References
adafruit. (2019). Adafruit_VS1053_Library [Arduino]. Retrieved from https://github.com/adafruit/Adafruit_VS1053_Library/archive/master.zip
lady ada. (2018, August 22). Adafruit Music Maker FeatherWing. Adafruit Industries. Retrieved from https://learn.adafruit.com/adafruit-music-maker-featherwing

Lab EC-sensor tests

Before using more EC probes in the field and gathering data from different parts of the stream I tested them in a controlled environment in the lab.

Experiment 1: 

The two versions tested use the same materials, same length of chord and same 560 Ohm resistor. The first test involved a jar filled with tap water, immersing both sensors in the jar and monitoring the data via mosquitto_sub.

Jar filled with tap water for testing two DIY EC probes

Note: The pink tape wrapped around one probe was an attempt to avoid the probe mistaken with a power plug on the lab table, which poses a severe hazard. The probes are stored away safely when unattended to ensure health and safety.  This version of the probe uses the Live (L) and neutral (N) prong of the plug. To improve the safety of the probe the live (L) prong should be removed and Neutral (N) and Ground (⏚) should be used for measuring the electric conductivity. 

The terminal output shows the EC probes publishing the measured values under the topics motorola/ec and moturoa/ecrua. While the test recording was done, the DHT11 sensor was also active in the lab, publishing air temperature (moturoa/atemp) and air humidity (moturoa/ahumid). Output showing values returned by two EC probes (moturoa/ec and moturoa/ecrua) and DHT11 sensor showing air temperature (moturoa/atemp) and air humidity (moturoa/ahumid)

This first test showed a deviation of around 10 between both probes, behaving relatively consistent. The next test would require measurements in the stream to see whether the probes return coherent readings from flowing  water.

Experiment 2:

Due to bad weather and high winds it was too dangerous to conduct testing in the field. However, to get a better idea of the consistency between the two probes I went to an easily accessible part of the stream outside of the forested area and collected two samples of stream water. 

Back in the lab I pour the first sample into a clean jar that is big enough to contain all three sensors. I prepared a paper sheet for keeping experiment notes, starting with date/time, location of sample taken, last weather and readings from the TDS meter at the beginning and end of the test.

  1. I boot the Raspberry Pi (the Pi acts as Wi-Fi Access POint hosting the Moturoa_Transmissions network and acts as the MQTT-broker).
  2. Connect laptop to Moturoa_Transmissions and start log with timestamp
    mosquitto_sub -v -h 192.168.42.1 -p 1883 -t '#' | xargs -d$'\n' -L1 sh -c 'date "+%D %T $0"' > data.log
  3. Immerse probes into water sample and activate by connecting the Wemos D1 micro controllers to power supplies (USB batteries).

The raw data of both test results can be found on the development repository.

Building a low-cost hydrophone

For this research I want to explore what kind of DIY electronics can amplify the voice of the forgotten streams in Poneke/Wellington, New Zealand. As a first device I want to build a hydrophone that can be used during fieldwork to record underwater sounds.

Hydrophones used in scientific research, for acoustic monitoring, such as for tracking marine animals, are relatively expensive and even DIY solutions feature costly elements (see for example Dawson, 2012). In low-cost DIY solutions old audio components, such as headphones or radios are re-used (e.g. digifishmusic, 2008) and made waterproof with silicone or hot glue.

I decided to combine building a hydrophone based on two instructions. Both are based on using an electret microphone element as the primary component. In the instructions of Decker (2013) the element is enclosed in an empty film canister filled with mineral oil as a medium to optimize the hyrdophone. I chose this design for the first version following a suggestion on the Wellington Sonic Arts Facebook. The instructions by the University of Waikato (2011) feature a component list that is available in New Zealand.

components used for first hydrophone prototype

Building the first version of the hydrophone took less than a day and involved researching the best possible option to be done within one day, sketching a schematic alongside a shopping list of necessary parts, planning the quickest route around town to buy all necessary parts and then 2 hours of soldering and assembling plus some extra time for testing and troubleshooting and documenting along the way.

detail of the electret microphone in the film canister
detail of the preamp (see similar component here)
hydrophone without casing next to Papwai Stream

I built the hydrophone as described in Decker (2013) but used a 3.5mm mono headphone jack at the end of the 3 meter long cable. I also soldered 3.5mm sockets to the pre-amp for in- and outputs to keep the device as modular as possible. For testing the hyrdrophone I used a pair of headphones, but I will be looking into options for adding a speaker. Currently, the pre-amp turns on and off by connecting and deconnecting the battery, which is cumbersome, so adding a switch would be a good improvement overall to be added to a (preferably waterproof) enclosure.

Dawson, S. (2012, January 20). Building the “CETOS” directional hydrophone. Retrieved from http://whaledolphintrust.org.nz/wp-content/uploads/Building-Directional-HPs.pdf

Decker, F. C. (2013, June). Underwater sound detection using sea perch through construction and operation of hydrophone. Retrieved from https://seaperch.byu.edu/wp-content/uploads/2013/06/Final.pdf

digifishmusic. (2008, January). How to make a Hydrophone (stereo!). freesound. Retrieved from http://www.freesound.org/forum/production-techniques-music-gear-tips-and-tricks/2631/?page=1#post13253

The University of Waikato, New Zealand. (2011, May 10). Make and Use a Hydrophone. Retrieved October 17, 2016, from http://sciencelearn.org.nz/content/download/20964/411858/version/7/file/Make+and+use+a+hydrophone.doc